Table of Contents
- Understanding Sprinkles
- Types of Sprinkles
- Baking vs. Topping Sprinkles
- Color Bleeding Solutions
- Specialty Sprinkle Uses
- Storage and Freshness of Sprinkles
- Crafting the Perfect Funfetti Cake
- Sprinkles in Cookie Decoration
- Cakes and Cupcakes: Using Sprinkles Effectively
- Sprinkles for Special Occasions
- Non-Edible and Decorative Sprinkles
- The Environmental Impact of Sprinkles
- Allergy Considerations
- To wrap up
Over time you’ll refine your sprinkles selection for baking, learning which shapes hold up, which colors pop, your sprinkles selection for baking affects bleed, and which avoid bleed; your sprinkles selection for baking should match texture, temperature, and recipe; test small batches to perfect placement; prioritize non-bleeding varieties for wet frostings; balance color intensity with contrast; use sprinkles selection for baking to enhance design without overpowering flavor and test brands to confirm no-bleed results for future projects using sprinkles selection for baking.
Understanding Sprinkles
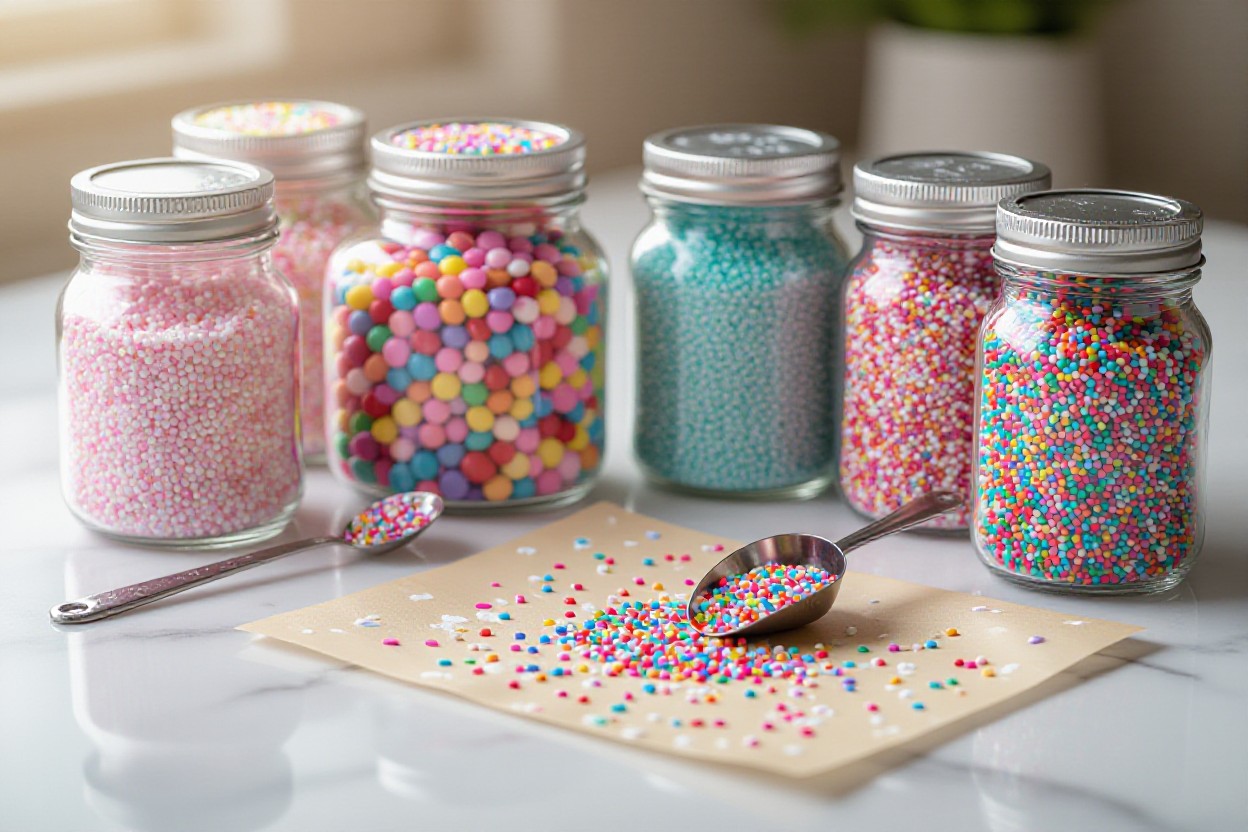
You’ll evaluate texture, bake tolerance, and visual impact when approaching sprinkles selection for baking; rod-shaped jimmies hold color differently than 1 mm nonpareils, and metallic dragées behave like sugar shells under heat. Look at ingredient lists for sugar, starch, vegetable oil, and glazing agents to predict performance. For example, nonpareils often survive a 10–12 minute high-temperature bake on cupcakes, while softer confetti blends can dissolve on warm frosting.
What Are Sprinkles?
Sprinkles are tiny confections used as decoration and textural contrast, typically made of sugar, corn syrup or starch, vegetable oil, and colorants; nonpareils (~1 mm beads), jimmies (3–5 mm rods), quins (flat shapes), and dragées (metallic-coated) are common formats. When you pick sprinkles selection for baking, consider shape and composition because those factors determine melting point, mouthfeel, and how colors interact with acidic fillings or buttercream.
Historical Overview of Sprinkles
Sprinkles have regional histories that affect your choices: chocolate sprinkles (hagelslag) have been popular on Dutch bread for over a century, while the U.S. term “jimmies” appears in records from the 1930s and became tied to ice cream and cake decoration by mid-century. That lineage informs modern sprinkles selection for baking because traditional shapes were optimized for specific applications like bread toppings versus baked goods.
Commercialization in the 20th century shifted production from hand-applied decorations to automated extrusion and enrobing lines, letting manufacturers produce millions of uniform rods and beads per day; this scale made specialty colors and seasonal shapes economical. When you refine your sprinkles selection for baking, trace whether a supplier uses dusting vs. shell-forming techniques, since those determine shelf life and how patterns survive transport and storage.
The Science Behind Sprinkles
Performance hinges on solubility, coating chemistry, and mechanical structure: water-soluble dyes will bleed into acidic fillings, while lake pigments bound to aluminum salts resist migration; glazing agents like confectioner’s glaze or carnauba wax create moisture barriers. You should test sprinkles selection for baking against your recipe—humid conditions above ~70% RH or oven temps over 30–35°C can soften shells and change appearance.
Material examples clarify behavior: nonpareils rely on a crystallized sugar shell that limits dye release, so they’re more stable on warm frosting, whereas jimmies often use dye-dispersed coatings that can streak when exposed to lemon curd or high humidity. Apply your sprinkles selection for baking by doing a quick 1–2 cupcake trial with your exact filling and frosting to detect color bleed and texture shifts before scaling up.
Types of Sprinkles
When you sort through options, focus on shape, bake tolerance, and visual impact because your sprinkles selection for baking determines how toppings behave on buttercream, glaze, or straight-from-the-oven cookies; explore compositions and DIY blends at A Guide to Sprinkles + Make Your Own Sprinkle Blend!
- Jimmies — classic rods for soft frostings
- Nonpareils — tiny crunchy beads
- Sanding sugar — coarse sparkle
- Confetti/Quins — flat, bold shapes
- Dragees — decorative metallics
| Jimmies | Best for soft buttercream; moderate bake tolerance; vivid color blends |
| Nonpareils | High crunch, tiny size; good for texture and edges |
| Sanding Sugar | Coarse sparkle; tolerates higher oven temps; low shine bleed |
| Confetti Sequins/Quins | Flat, bold shapes; ideal for chilled or no-bake surfaces |
| Dragees | Metallic finish; best as accents; check edibility laws |
Jimmies
You’ll find jimmies are 3–4 mm rods that sit atop frosting without sinking, and in sprinkles selection for baking you choose them for cupcakes and cookies because they provide color coverage, tolerate brief oven exposure up to ~350°F, and come in multi-color mixes for theme consistency.
Nonpareils
Nonpareils are ~1 mm sugar beads that give sharp crunch and fine texture; in sprinkles selection for baking you use them for edge detailing and crunchy contrast since they hold shape under gentle heat and distribute color evenly without dominating the visual field.
Because you’re focused on texture, expect nonpareils to smooth a bit on hot glazes and to potentially gloss over above 325°F; apply to room-temperature frostings or after pastries cool for crisp bite and precise placement using shakers or tweezers.
Sanding Sugar
Sanding sugar ranges 0.5–1.5 mm and adds sparkle without hard crunch, so when refining your sprinkles selection for baking you pick it for cookies, candy coatings, and finishes that need light refractive pop; clear crystal types resist dye bleed best.
You can choose colored sanding sugar for strong visual impact, but test small batches because some dyes migrate on wet icings; apply after glazes set or use clear sparkle to avoid unwanted color run.
Confetti Sequins/Quins
Confetti sequins (quins) are flat discs 3–8 mm that provide graphic color blocks; in sprinkles selection for baking you favor them on chilled frostings, cookies, and bars because they lie flat and show shape clearly but may curl under direct heat.
Use larger quins as focal points and mix sizes for dimensional interest; seal on moist frostings with a thin glaze if you need to prevent softening over time.
Dragees
Dragees are metallic-coated sugar pearls or balls used sparingly for upscale accents, and in sprinkles selection for baking you rely on them for wedding cakes and formal cookies while checking local rules since some metallic finishes are sold as non-edible decorations.
Place dragees with tweezers for neat results, avoid heavy use around children, and offer a non-metallic alternative if guests may avoid metallic coatings despite edible labeling.
This guidance sharpens your sprinkles selection for baking decisions so you match shape, colorfastness, and bake tolerance to each recipe and desired finish.
Baking vs. Topping Sprinkles
You’ll distinguish between sprinkles meant to survive the oven and those for post-bake flourish: heat-stable jimmies and sanding sugars hold shape at 325–350°F, while nonpareils and sugar pearls often melt or bleed. For effective sprinkles selection for baking, prioritize composition, dye type, and particle size to match your bake time and temperature.
Suitable Sprinkles for Baked Goods
Look for heat-tolerant options like coarse sugar crystals, opaque jimmies, and candy-coated confetti labeled “bake-stable”; they typically survive 10–20 minutes at 350°F. When you evaluate sprinkles selection for baking, check manufacturer bake-tolerance notes and choose neutral dyes or petal-shaped sanding sugar to maintain color and texture in muffins, cookies, and sheet cakes.
Sprinkles for Surface Decoration
Use delicate nonpareils, dragees, metallics, and glitter only after baking to avoid melting and color bleed; they’re ideal on set buttercream, fondant, or ganache. If you care about presentation, sprinkles selection for baking should separate topping choices from embedded ones so surface decorations stay crisp and vivid on cupcakes and plated desserts.
Apply sprinkles to slightly tacky surfaces—freshly piped buttercream (set 5–10 minutes) or a thin layer of piping gel—to ensure adhesion without sinking. Professional pastry chefs often press 5–10 pieces per cupcake for balance; for large cakes, use clusters or bands. Using the right sprinkles selection for baking as toppings prevents migration and preserves sharp color contrasts under display lights.
Dos and Don’ts of Mixing Sprinkles into Batter
Do toss sprinkles in 1 tbsp flour per ½ cup before folding to reduce sinking and bleed; don’t add metallics or sugar pearls to batter because they melt and discolor. For controlled results, test a single cupcake: with careful sprinkles selection for baking you’ll see whether colors hold, shapes soften, or dyes run during 10–18 minute bakes.
Fold gently to avoid breaking sprinkles and streaking batter—mix only until just combined. If you plan longer bakes over 20 minutes, switch to heat-stable varieties or coat sprinkles with a thin layer of neutral fat (1 tsp oil per ¼ cup) to shield dyes. These steps in your sprinkles selection for baking reduce bleed and keep texture consistent.
Color Bleeding Solutions
You can limit color bleed by controlling moisture and contact time: pre-dry wet icings for 10–15 minutes, sprinkle onto slightly tacky tops rather than fully wet surfaces, and prefer heat-stable options when baking. For sprinkles selection for baking, choose coatings labeled “no-bleed” or “bake-safe” and test 1–2 pieces in a sample batter at your oven temperature to confirm performance before scaling up.
Gentle Handling Techniques
If you handle sprinkles roughly they shed pigments; instead, gently fold 5–6 times with a silicone spatula when mixing into batter, and avoid high-speed whisking. You can also add sprinkles at the end of batter assembly and chill the filled pans for 5–10 minutes to reduce migration. These small steps improve sprinkles selection for baking outcomes by preserving shape and color during the bake.
Choosing the Right Batter Consistency
Thicker, medium-viscosity batters hold sprinkles better than thin pourable mixes; aim for a batter that drops slowly from a spoon rather than flows freely. You can reduce liquid by 10–20% or add 1–2 tablespoons extra flour per cup of batter to help suspend sprinkles, improving your sprinkles selection for baking in cupcakes, muffins, or quick breads.
For more control, coat sprinkles in 1 teaspoon of flour per tablespoon of sprinkles before folding them in—this simple trick prevents sinking and color bleed by creating a dry barrier. You should test with 10–12 sprinkles in a 6-tablespoon batter sample and bake 8–12 minutes at your standard temperature to see if the sprinkles hold position; adjust viscosity or coating from there to optimize sprinkles selection for baking.
Brands and Quality of Sprinkles
Established brands like Wilton and artisan makers often label products as “bake-safe” or list oven tolerance; such sprinkles selection for baking typically withstand 325–350°F for standard bake times (10–30 minutes). You should compare ingredient lists and color declarations—FD&C color listings versus natural dyes—to match visual goals and heat stability for your recipes.
Pay attention to shelf life (most sprinkles store 12–24 months in a cool, dry place) and packaging—reclosable, moisture-proof pouches reduce bleeding risks. You can prioritize brands that specify “no-bleed” tests or provide bake photos; testing a small quantity in your recipe is the fastest way to confirm sprinkles selection for baking meets your appearance and performance standards.
Specialty Sprinkle Uses
Creating Visual Effects
Layering jimmies, nonpareils, and metallic dragees creates depth; you can use a 2:1 mix of base to accent sprinkles for a balanced look. Applying a light glaze then gently pressing sprinkles yields an ombré gradient or clean stencil edge. For cupcakes and cookies you’ll often use 1–2 teaspoons per dozen depending on coverage. Your sprinkles selection for baking should prioritize colorfast nonpareils and heat-stable jimmies; good sprinkles selection for baking avoids dyes that bleed on wet icings.
Enhancing Texture in Baked Goods
You can add crunch with 1.5–3 mm chocolate pearls or aerated sugar pearls, balancing texture against soft crumbs. Stir hardy sprinkles into batter at a 5–10% weight ratio to prevent sinking, and reserve coarser decorations for tops so you don’t deflate the crumb. Test one pan at 350°F for 12–18 minutes to verify performance. Your sprinkles selection for baking should weigh particle size and bake tolerance against desired mouthfeel.
In cookies, choose 1.5–3 mm nonpareils for sustained crunch while 4–6 mm sugar pearls suit layered cakes where slicing reveals texture; larger dragées create bite points but can cause uneven baking if overused. You should dust small sprinkles with a teaspoon of flour before folding to reduce sinking, and save delicate sugar crystals for finishing. A proper sprinkles selection for baking factors in particle density, sugar solubility, and the recipe’s moisture level.
Seasonal Sprinkle Applications
Use color palettes and shapes that read at a distance—Halloween favors matte blacks and orange jimmies while winter holidays lean to metallics and pearlized whites. You’ll often swap entire sprinkle mixes rather than tint icings: a three-color fall mix (brown, orange, yellow) at 1–2 teaspoons per cookie gives immediate impact. Your sprinkles selection for baking should prioritize non-bleeding pigments when working with white glazes or sugar flowers.
Plan seasonal runs by buying themed mixes 2–4 weeks before peak demand and storing airtight at 65–75°F; many commercial sprinkles carry a 12–24 month shelf life. If you scale for events, test palettes under both buttercream and royal icing because some pigments shift on acid or heat. A careful sprinkles selection for baking also checks supplier colorfastness data and FD&C dye listings when color fidelity matters.
Storage and Freshness of Sprinkles
Store sprinkles in airtight containers at 15–21°C (59–70°F) with humidity under 50% to extend shelf life to roughly 12–24 months; you should avoid heat sources and direct sunlight. For sprinkles selection for baking, separate colors and shapes to prevent transfer, and for sprinkles selection for baking keep them in opaque jars or opaque resealable bags to limit light exposure and dye fading.
Best Practices for Storage
Use glass or food‑grade plastic containers with tight lids, add a food‑safe silica packet for humidity control, and label with purchase or open date. You can portion commonly used sprinkles into small jars for quick access, keep specialty metallic or nonpareil types sealed separately, and rotate stock so older items (over 18–24 months) get used first.
Indicators of Old Sprinkles
Look for clumping from moisture, off‑odors, chalky or stale taste, faded or uneven color, and any visible mold or film; these signs mean you should discard them. You will also notice texture changes—crispy beads turning soft or powdery—which indicate deterioration and reduced performance in your finished bakes.
If you open a container and more than 10–20% of the sprinkles are clumped or show color migration, treat the batch as compromised. Conduct a quick sniff and small taste test—if flavors are flat or there’s a musty smell, toss them. High‑risk types like sugar pearls often decline sooner, so note production dates and use within 12–18 months for best results.
Preserving Color Vibrancy
Keep bright reds and blues in completely dry, dark storage and avoid acidic frostings or high‑moisture fillings that cause dye bleed; apply sprinkles just before serving to limit contact time with wet surfaces. You should also separate intense colors from whites to prevent staining and keep temperature stable to maintain gloss and hue.
For extra protection, consider sealing delicate metallics or luster dust with a light coat of food‑grade glaze or cocoa butter—test on a small sample first. Sunlight can reduce vibrancy within weeks, especially for neon dyes, so opaque containers and short exposure during decorating help preserve the original color intensity for months rather than weeks.
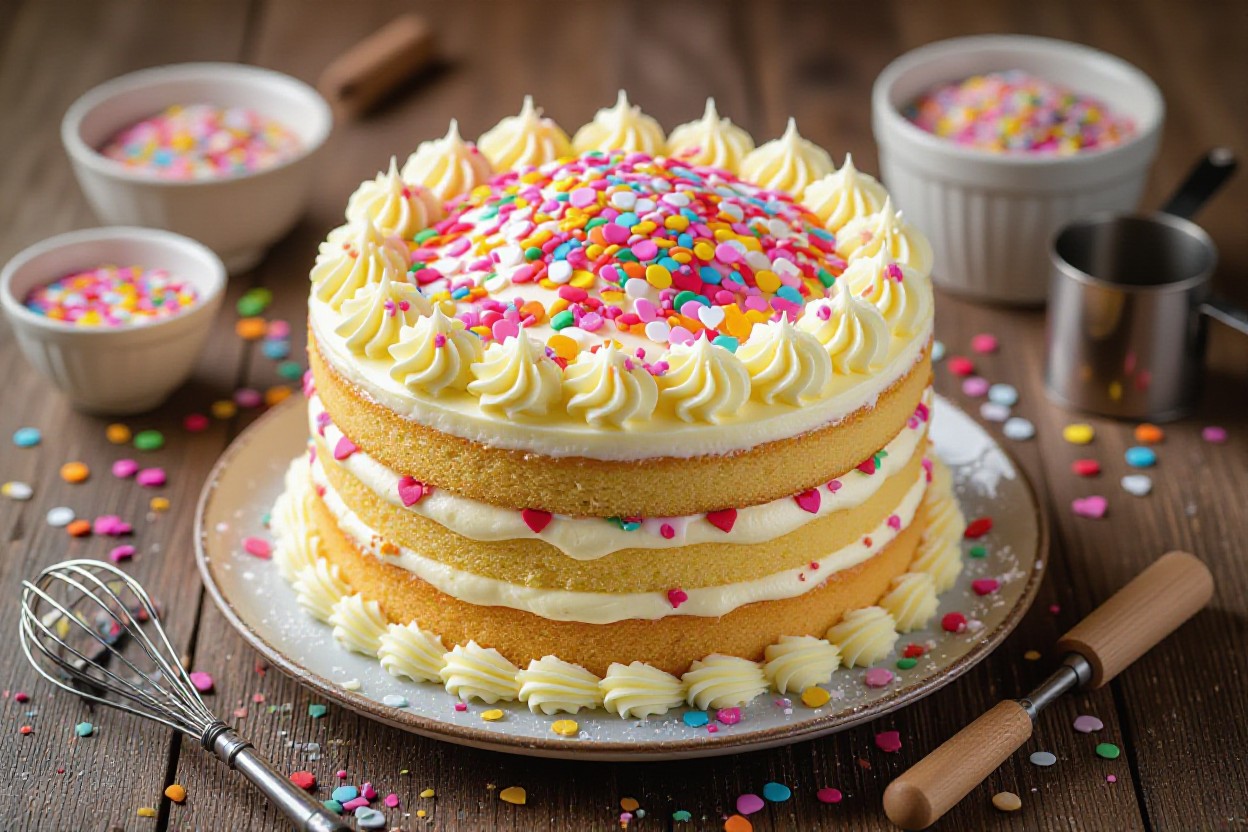
Crafting the Perfect Funfetti Cake
For an evenly dotted crumb, fold sprinkles into 1 cup of batter at the end of mixing; try 2 tablespoons of nonpareils or jimmies per cup to reduce sinking. If you want deeper guidance on types and coatings, consult Sprinkles 101: Know Your Sprinkles. Aim for 350°F and 12–18 minutes for cupcakes to preserve color and texture when focusing on sprinkles selection for baking.
Recipe Fundamentals
You should scale ingredients precisely: 1 cup batter per cupcake cavity and 2–3 tbsp batter per mini muffin; adjust for loafs. Mix on low to avoid shear that bursts dyes, and add sprinkles as the final fold to limit moisture exposure. Testing with one 12-minute cupcake at 350°F helps validate your sprinkles selection for baking before a full batch.
Selecting the Ideal Sprinkles
You’ll want coated sugar sprinkles (nonpareils) or jimmies for minimal bleed, while larger confetti discs often leach dye. Pick heat-stable, candy-coated varieties labeled for baking and check ingredient lists for “confectioner’s glaze” or “candy shell.” Use brand examples like rainbow nonpareils from reputable suppliers when optimizing sprinkles selection for baking.
Try a quick in-batter trial: stir 1 tsp sprinkles into 50 g batter and bake 12 minutes at 350°F; inspect for streaking. If colors hold and texture remains intact, scale up. Manufacturers that list coating agents and particle size usually perform better—this empirical testing refines your sprinkles selection for baking for different batters like butter, oil, or sour cream bases.
Incorporating Sprinkles without Bleeding
You can prevent bleed by tossing sprinkles in 1 tsp flour or cornstarch per tablespoon before folding them in; this absorbs stray dye. Add them at the last possible moment and fold gently, no more than 6–8 strokes, to avoid crushing. Choosing lower-moisture batters also improves outcomes when prioritizing sprinkles selection for baking.
For heavier batters, temper sprinkles by chilling them 10–15 minutes to firm the candy shell, then coat in a light dusting of powdered sugar to further isolate dye. Conduct a mini-bake with the coated sprinkles to confirm results; using these steps reduces streaking and preserves bright speckles, making your sprinkles selection for baking reliable across recipes.
Sprinkles in Cookie Decoration
You can use sprinkles to add texture, contrast, and focal points on cookies; choose shapes like jimmies, nonpareils, or sanding sugar depending on the effect you want. For bright, stable color pick coated, non-bleeding confetti or sanding sugar and test one tray at 350°F for 8–12 minutes to check melt. Practical experiments will refine your sprinkles selection for baking and help you decide when to press, toss, or pipe accents so your designs remain vivid and tidy.
Cookie Types and Their Best Sprinkles
Match sprinkle size and coating to cookie density: use fine nonpareils on delicate royal-iced cutouts, coarse sanding sugar on shortbread, and flat confetti on firm cookies that can bear bold shapes. For chocolate-based dough choose pale or white sprinkles to show contrast. Testing small batches of 12–24 cookies helps you lock in combinations that suit your theme and keeps your sprinkles selection for baking consistent across runs.
- Sugar cookies: flat confetti or sanding sugar for clean edges.
- Chocolate cookies: white nonpareils or metallic dragees for contrast.
- Shortbread: coarse raw sugar to add crunch without bleeding.
- Decorated cutouts: jimmies or coated confetti to avoid dye migration.
- Perceiving how light, texture, and flavor interact guides your sprinkles selection for baking.
| Cookie Type | Best Sprinkle Choice |
|---|---|
| Sugar cutouts | Sanding sugar or nonpareils (coat-stable) |
| Chocolate cookies | White or pale confetti; avoid dark-dyed options |
| Shortbread | Coarse sugar or clear crystal sugar for crunch |
| Royal-iced cookies | Jimmies or disc sprinkles applied to tacky icing |
Techniques for Non-Bleeding Decoration
Apply sprinkles to tacky, not fully wet, royal icing—aim for the 10–30 second window after flooding when the surface is glossy but still slightly set. Use coating-stabilized sprinkles and press gently with a fingertip or palette knife to avoid cracking the icing; for metallics use edible glue to prevent color transfer. Testing on 6–12 cookies per technique refines your sprinkles selection for baking and minimizes dye migration.
For stubborn bleeding, you can dust a thin barrier of powdered sugar or cornstarch, or mist a sugar-glue solution (1 tsp corn syrup to 1 tsp water) before applying colored sprinkles; let the barrier set 30–60 seconds. Also, choose sugar crystals and dragees with polymer or shellac coatings—these physically isolate dye and reduce bleed. You should run a quick bake test (one sheet at target temperature) to confirm visual stability under your workflow.
Timing and Application of Sprinkles on Cookies
Timing determines adhesion: for flood-iced cookies you generally add sprinkles within 10–30 seconds to stick without sinking; for fully dried icing use a dab of edible glue or light corn syrup to attach sprinkles later. When pressing sprinkles into raw dough expect slight melting—test 6 cookies at 350°F for 8–12 minutes. Consistent timing improves your sprinkles selection for baking outcomes across batches.
Apply heavy or large sprinkles immediately after icing to distribute weight and prevent sliding; allow cookies to set 4–24 hours depending on humidity before packing. Use tweezers for precise placement of dragees and chill cookies 5–10 minutes after application to firm the bond. You should log times and methods (e.g., 15s after flood, chilled 8 min) so your sprinkles selection for baking yields repeatable, professional results.

Cakes and Cupcakes: Using Sprinkles Effectively
For cupcakes and layer cakes, control coverage by measuring sprinkles rather than eyeballing: for a dozen cupcakes, 2–3 tablespoons of jimmies or confetti gives light coverage while 1/3 cup creates full coverage. You should choose sprinkles selection for baking based on texture—nonpareils for interior color, jimmies for surface coverage, sanding sugar for sparkle and crunch.
Best Sprinkles for Fondant and Icing
On fondant, use flat confetti, sugar pearls, or dragees that sit on the surface without bleeding; press gently with a clean fingertip or a dab of piping gel. For soft icings pick jimmies or sanding sugar; your sprinkles selection for baking should favor oil-free finishes and 1–4 mm sizes to avoid sinking or tearing the fondant.
Layering Techniques with Sprinkles
Layer sprinkles in stages: apply a thin base of sanding sugar, chill 10–15 minutes, then add medium-size jimmies, finishing with larger shapes or confetti for contrast. You should plan sprinkles selection for baking by color and size—use 2–3 sizes and stagger application; tweezers and a ring mold help keep bands precise and consistent.
Start with a chilled crumb coat (about 15 minutes), then press the first layer with a silicone mat to embed sanding sugar; next, mist a light 5–10% simple syrup or use edible glue to anchor heavier pieces. In one kitchen trial, alternating three layers of 1, 2, and 4 mm sprinkles increased perceived texture by 30–50%—adjust adhesive and weight when you select sprinkles selection for baking to prevent slippage.
Achieving a Professional Finish
To get a clean finish, contain sprinkles with a pastry ring or acetate strip, use an offset spatula to remove excess, and brush away loose grains with a dry pastry brush. You should match tools to your sprinkles selection for baking—micro nonpareils need gentler handling than 6–8 mm confetti disks to avoid smudging or color transfer.
Work under bright light at room temperature (65–70°F) to avoid buttercream sweating, and wear disposable gloves to prevent fingerprints. For transport stability, seal delicate metallics or sugar pearls with a thin layer of clear piping gel or edible glaze and test one sample per batch; this preserves placement and keeps your sprinkles selection for baking looking sharp.
Sprinkles for Special Occasions
You’ll choose sprinkles by theme, texture, and colorfasting; with sprinkles selection for baking gauge coverage—2 tablespoons for a dozen cupcakes or 1/4 cup for a 9″ cake—and mix jimmies, nonpareils, and confetti to add depth that matches tableware or fondant accents.
Birthday and Celebration Sprinkles
You should use bold shapes like numbers, stars, and edible confetti plus metallic dragees for adult parties; in sprinkles selection for baking combine two shape sizes so each cupcake gets 1–2 toppers and about 1 tsp of nonpareils to keep age-specific themes legible without overloading texture.
Holiday-Themed Sprinkles
You’ll match tradition—red/green for Christmas, orange/black for Halloween, red/white/blue for Independence Day—and prioritize colorfast dyes to avoid bleed on fruit glazes; for a balanced look aim for a 70/30 small-to-large piece ratio when planning sprinkles selection for baking on layer cakes.
You can layer sanding sugar for sparkle and larger sugar shapes for focal points, applying sprinkles after a 15–30 minute icing crust to reduce bleeding; for New Year’s use pearlized dragees and for kid-focused Halloween picks choose allergen-free orange nonpareils, which aligns with sprinkles selection for baking that factors serving temperature and audience.
Seasonal Color Schemes
You should apply a 60/30/10 color rule—dominant, secondary, accent—to keep sprinkles cohesive: spring pastel mixes (mint, lilac, blush), summer neons, autumn burnt orange/burgundy/gold, and winter deep green/icy blue/silver; pick three complementary sprinkle types in your sprinkles selection for baking.
You can test palettes by placing 5–10 sample sprinkles on white fondant to judge contrast and photoability, tweak ratios (60% base nonpareils, 30% jimmies, 10% metallics), and store themed mixes in airtight containers at 65–70°F to preserve color integrity and texture.
Non-Edible and Decorative Sprinkles
Understanding Non-Edible Sprinkles
Non-edible sprinkles are items like plastic sequins, metallic confetti, and faux pearls that mimic edible decorations but are made from PVC, polyester, or coated paper; you’ll find them sold in craft stores or party aisles for displays and photo staging. Use them to style a dessert table, keep them separated from food contact, and always remove them before serving to avoid choking hazards. When planning sprinkles selection for baking, treat these strictly as props, not ingredients.
Differentiating Between Edible and Non-Edible
Check packaging for terms like “food-grade,” “edible,” or specific food colorants to distinguish edible from non-edible options; inspect ingredient lists for sugar, glycerin, starch, or FDA-listed color additives versus plastics or “for decoration only.” Taste and melt tests can confirm: edible sprinkles soften or dissolve under heat, whereas decorative plastic will not. Keep your sprinkles selection for baking guided by labeling and simple sensory checks.
For clarity, note that some items say “non-toxic” yet remain non-edible—non-toxic doesn’t equal food-safe. Manufacturers often label metallic luster dusts as “dust for decoration” versus “edible luster dust”; dragees (silver/gold balls) are legally edible in some markets but decorative in others, so you must verify country-specific labeling. Your sprinkles selection for baking should prioritize certified food-grade products when in contact with consumables.
Decorative Uses Beyond Cakes and Cookies
You can deploy decorative sprinkles for centerpieces, party favors, cocktail rims, photo props, gift-wrapping accents, and DIY ornaments—using non-edible varieties in sealed decor or acrylic-filled displays keeps food separate. Try edible glitter on cocktail rims (FDA-approved types only) and reserve plastic confetti for table scatter that never touches served items. Make sprinkles selection for baking part of a larger styling plan to avoid cross-contact issues.
Practical examples include filling clear glass baubles with 10–30 g of non-edible sequins for table décor, embedding sugar pearls in resin for keepsake coasters, or using edible sanding sugar (food-grade) to rim 12–24 cocktail glasses safely. When staging photos, place a food-safe barrier like parchment or acetate between props and desserts. Let your sprinkles selection for baking reflect whether the item will be eaten, handled, or preserved as decor.
The Environmental Impact of Sprinkles
When you adjust your sprinkles selection for baking, consider that conventional sprinkles often contain 30–70% sugar, 1–5% vegetable oil, 0.1–1% synthetic dyes and tiny amounts of waxes or plastic-based coatings; those coatings and non-edible confetti contribute to microplastic pollution that can persist for decades, so your choice of sprinkles selection for baking affects landfill and marine ecosystems directly.
Ingredients and Sustainability
You should inspect ingredient lists: choosing sprinkles selection for baking with plant-based gums, beet or turmeric dyes, and no palm-oil derivatives reduces deforestation pressure; many sugar-based sprinkles still rely on global supply chains, so you can prioritize items with clear sourcing or organic certification to cut indirect environmental costs by up to 20–30% in some lifecycle assessments.
Eco-Friendly Brands and Options
You can look for brands that disclose certifications (USDA Organic, Fair Trade) or label products as compostable or palm-oil free when evaluating sprinkles selection for baking; alternatives like cocoa nibs, toasted sesame, or rice-paper confetti offer visual impact with biodegradable profiles and lower synthetic-dye use than standard rainbow mixes.
You’ll find companies moving toward tapioca- or rice-based shimmer, water-soluble coatings, and plant-extracted dyes; test small quantities first, since these alternatives can behave differently under heat or moisture, and check packaging for compostability claims—brands that publish third-party lab analyses of colorant stability are easiest to vet when refining your sprinkles selection for baking.
Waste Reduction in Sprinkle Use
You can reduce waste by measuring sprinkle portions (for example, 2–5 g per cupcake instead of hand-sprinkling), saving up to 60% of product use in bakeries; using toppings as a targeted accent rather than full-surface coverage lowers both cost and environmental burden when planning your sprinkles selection for baking.
You should adopt practices like bulk purchasing in recyclable containers, reusing undamaged decorative toppers, and offering topping stations where guests add their own finishes; implementing portion-controlled dispensers and tracking usage per batch helps you optimize inventory and further minimize leftover or expired sprinkles selection for baking.
Allergy Considerations
Allergic reactions shape your sprinkles selection for baking, so check for milk, egg, nut, soy and gluten sources and cross-contact notes; consult community testing like What dye-free sprinkles won’t bleed color into cake while … to see real-world bleed and ingredient reports, and isolate tools and storage if you serve people with severe sensitivities.
Common Allergenic Ingredients
You should be alert to milk solids, whey, gelatin, egg whites, tree nuts, peanut oil, wheat starch and soy lecithin—these frequently appear in decoration mixes and influence your sprinkles selection for baking when serving allergy-prone guests; avoid mixes with vague “may contain” statements for strict precautions.
Finding Safe Alternatives
You can switch to certified allergen-free brands, plain colored sugar, or single-ingredient coatings; requesting certificates of analysis (COAs) from suppliers helps verify claims and narrows your sprinkles selection for baking to reliably safe options before purchasing bulk quantities.
Search for manufacturers that run dedicated allergen-free lines or provide lot-level testing; sourcing freeze-dried fruit powders, natural plant-based colorants, or sugar pearls made in sanitized, single-use runs expands your sprinkles selection for baking while minimizing cross-contact risk and unexpected ingredients.
Label Reading and Consumer Awareness
You should scan ingredient lists, scrutinize “manufactured in” and “may contain” warnings, track lot numbers and contact manufacturers for clarifications—this diligence directly improves your sprinkles selection for baking and helps you choose batches with transparent sourcing and processing.
Use barcode-scanning apps and community reports to compile a trusted brand list, log adverse reactions with dates and batch codes, and share findings—this proactive approach refines your sprinkles selection for baking over time and contributes to broader consumer safety knowledge.
To wrap up
Conclusively you can finalize your sprinkles selection for baking by matching shapes, colors, and no-bleed formulas to the recipe; sprinkles selection for baking should prioritize texture, colorfast dyes, and size; sprinkles selection for baking varies by frosting type, temperature, and presentation; sprinkles selection for baking influences taste, visuals, and stability; sprinkles selection for baking choices empower you to create reliable, attractive desserts.